

Connecting Solana to MetaMask is not as straightforward as linking Ethereum or Polygon, since MetaMask was originally built for EVM based networks. But thanks to MetaMask Snaps, a new feature that lets you expand your wallet’s capabilities, you can now add Solana support safely and easily.
In this guide, you will learn how to enable Solana access in MetaMask using trusted Snaps like Solflare Snap, manage SOL and SPL tokens directly, and explore Solana dApps without switching wallets. It is a simple way to keep using MetaMask while tapping into Solana’s fast and low cost ecosystem.
What Is MetaMask Web3 Wallet?
MetaMask is widely recognized as the native non-custodial wallet for Ethereum, supporting over 500,000 tokens and easily connecting to leading EVM blockchains like Polygon, Arbitrum, and Avalanche. Its browser extension allows quick, secure interactions with dApps, making it easier to use compared to other web3 wallet. MetaMask also provides integration with multiple hardware wallets, allowing users to secure their private keys.
With the introduction of its new Snaps feature, MetaMask now allows developers to create custom extensions and integrations directly within the wallet. One of the most notable implementations comes from Solflare, which enables users to connect MetaMask to the Solana network seamlessly. This guide will walk you through connecting your MetaMask wallet to Solana dApps, installing the Solflare Solana Wallet Snap, setting up your Solana wallet, and bridging ETH to Solana all within MetaMask.
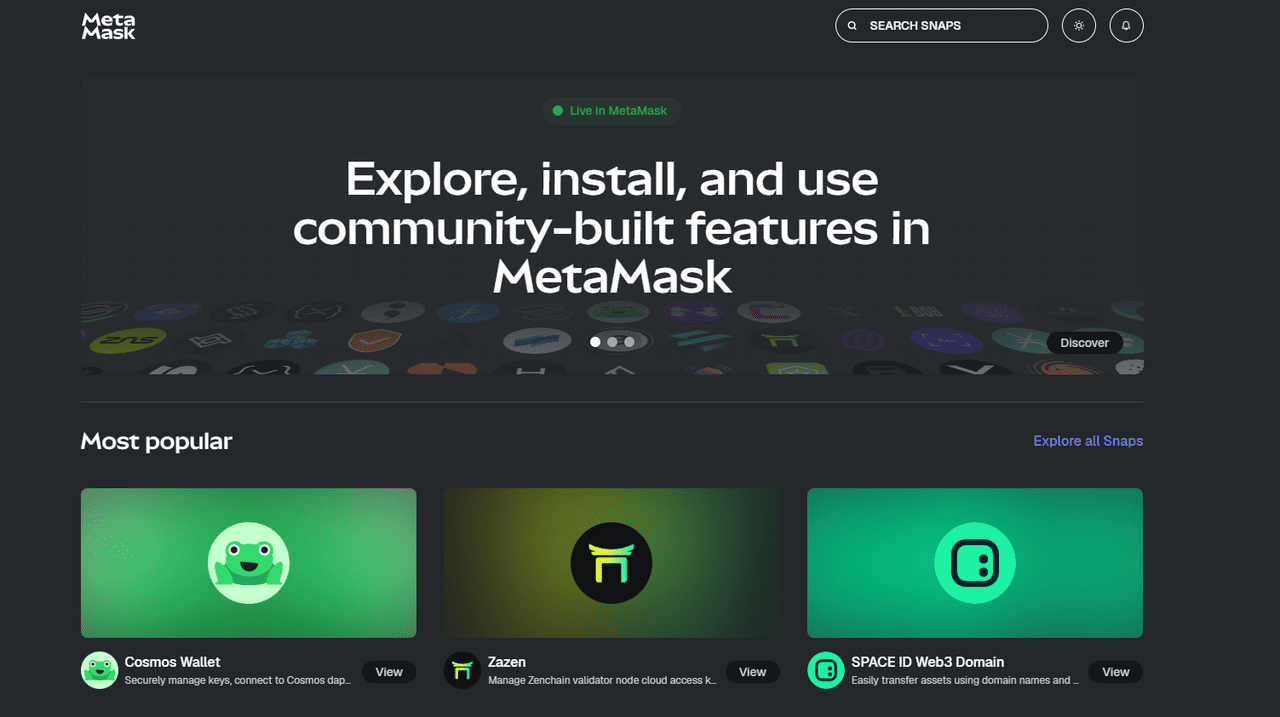
Source: MetaMask.io
What Is MetaMask Snap and How Does It Work?
MetaMask Snaps are wallet add-ons that unlock features MetaMask doesn’t support natively, most importantly, the ability to connect with non-EVM layer-1 blockchains like Solana, TRON, and even Bitcoin. Since MetaMask is built for Ethereum and EVM chains, it normally can’t understand the transaction formats, token standards, or account structures of other networks. Snaps solve this by adding custom logic inside MetaMask, allowing the wallet to generate Solana-compatible accounts, sign transactions, and interact with Solana dApps directly.
When you install a Solana Snap like Solflare Snap, MetaMask creates a Solana account derived from your existing Secret Recovery Phrase, meaning the same seed controls your EVM and Solana wallets, but Snaps never gain access to the phrase itself. After activation, you can send, receive, and manage SOL and SPL tokens, approve transactions, and connect to Solana dApps from within the MetaMask interface.
Notably, the Solflare Solana Wallet Snap allows users to store Solana tokens and NFTs, connect directly to Solana applications, and bridge assets seamlessly to the Solana network, all from within their MetaMask wallet. This makes MetaMask a versatile tool for interacting not only with Ethereum but also with non-EVM blockchains like Solana.
Source: cryptotimes.io
Why Connect Solana Network to MetaMask?
By connecting Solana to MetaMask, users now have access to a faster, cheaper, and more gamer friendly network. While Ethereum is more decentralized, secure, and has a stronger DeFi/NFT ecosystem, Solana is built for high throughput and speed, regularly handling thousands of transactions per second.
Solana boasts extremely low transaction costs (often fractions of a cent), making it ideal for high-frequency and microtransaction apps. These features have drawn attention from many consumer apps and game developers.
By connecting Solana to their MetaMask, users can now participate in this ecosystem seamlessly without opening another wallet exclusive to Solana. The full list of supported blockchains from MetaMask is here.
How to Connect MetaMask to Solana: Step-by-Step Guide
You can enable Solana support in MetaMask by installing a Solana Snap, which adds non-EVM compatibility and lets your wallet send, store, and sign Solana transactions. Here's how:
Step 1: Set Up Your MetaMask Wallet
Have a MetaMask wallet with a positive ETH balance and a modern web browser such as Chrome, Firefox, or Brave.
Note: While you can install the Solflare Snap if you don't have any ETH, keep in mind that you won't be able to bridge funds without a balance.
Step 2: Set Up MetaMask Snaps for Solana
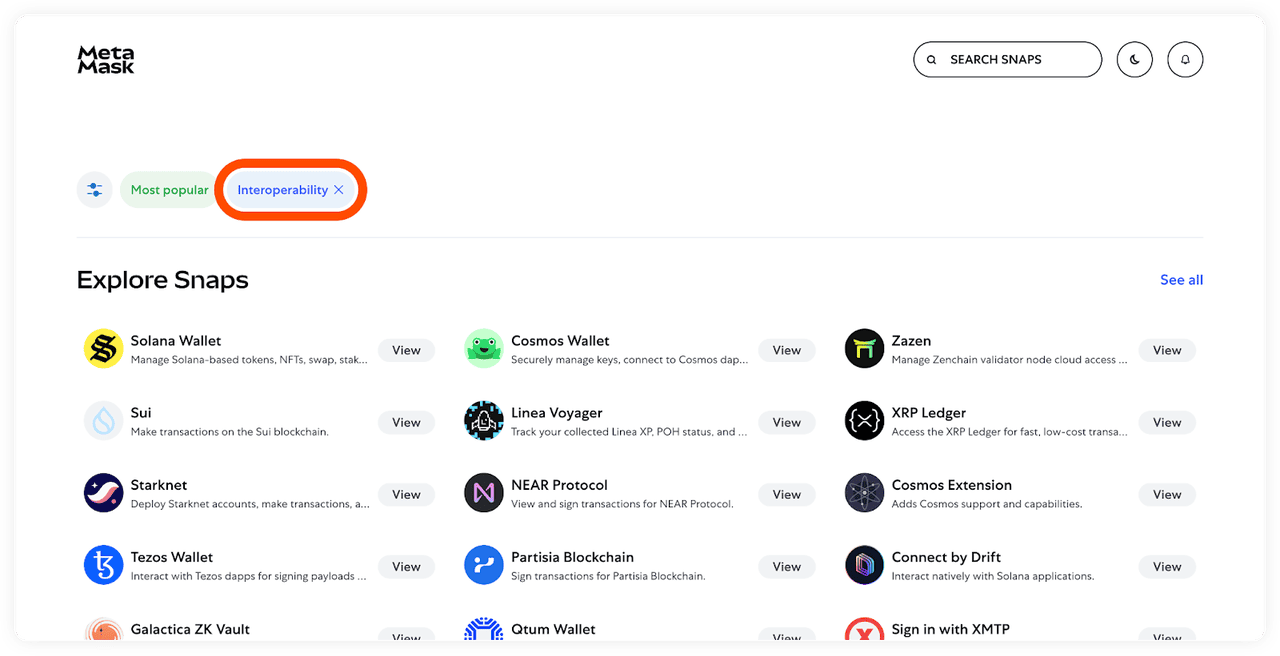
Navigate to the MetaMask directory of Snaps available for download at https://snaps.MetaMask.io/ and select Solana Wallet by Solflare
Source: Quicknode
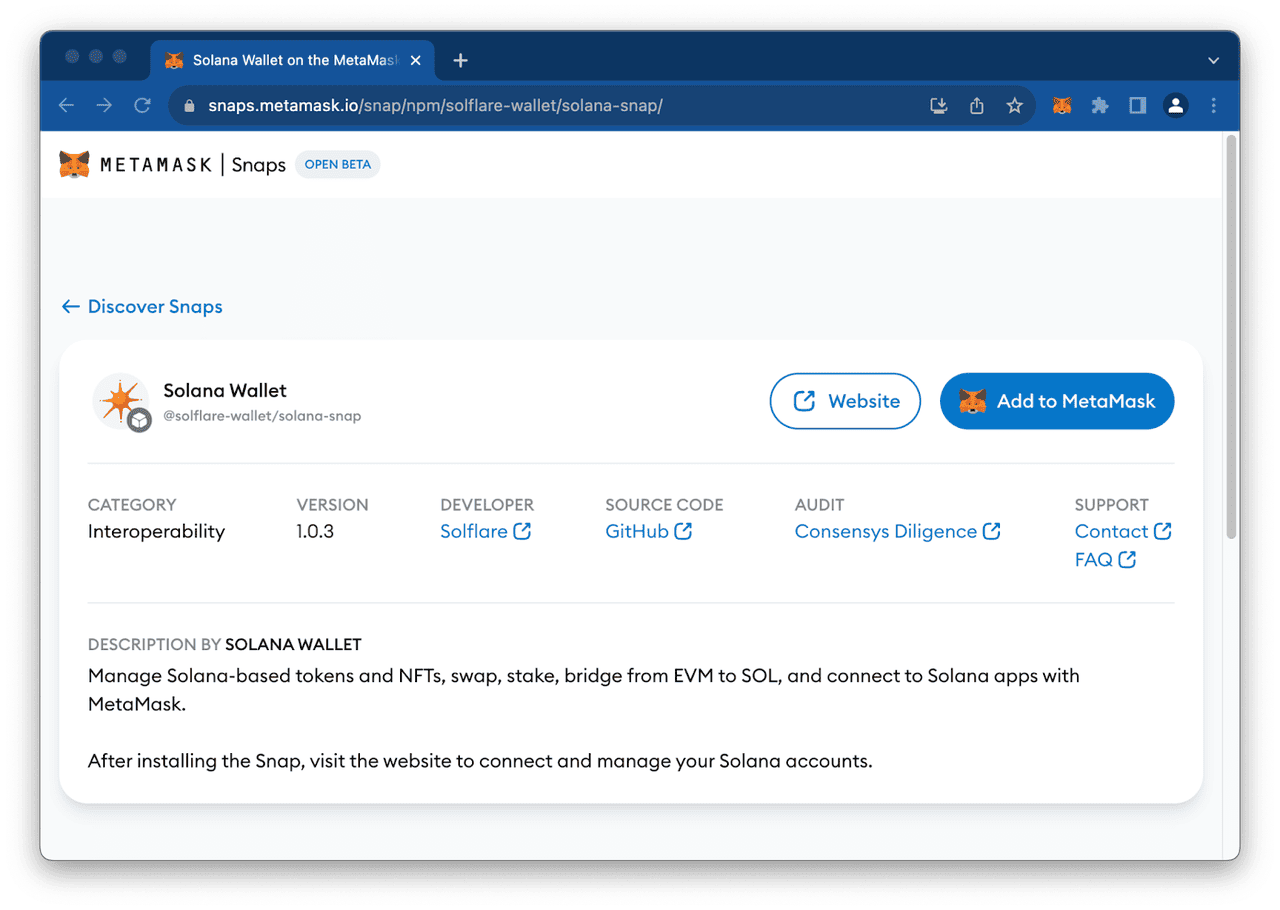
Step 3: Configure MetaMask Snaps for Solana
Click the "🦊 Add to MetaMask" button and follow the steps prompted in your wallet:
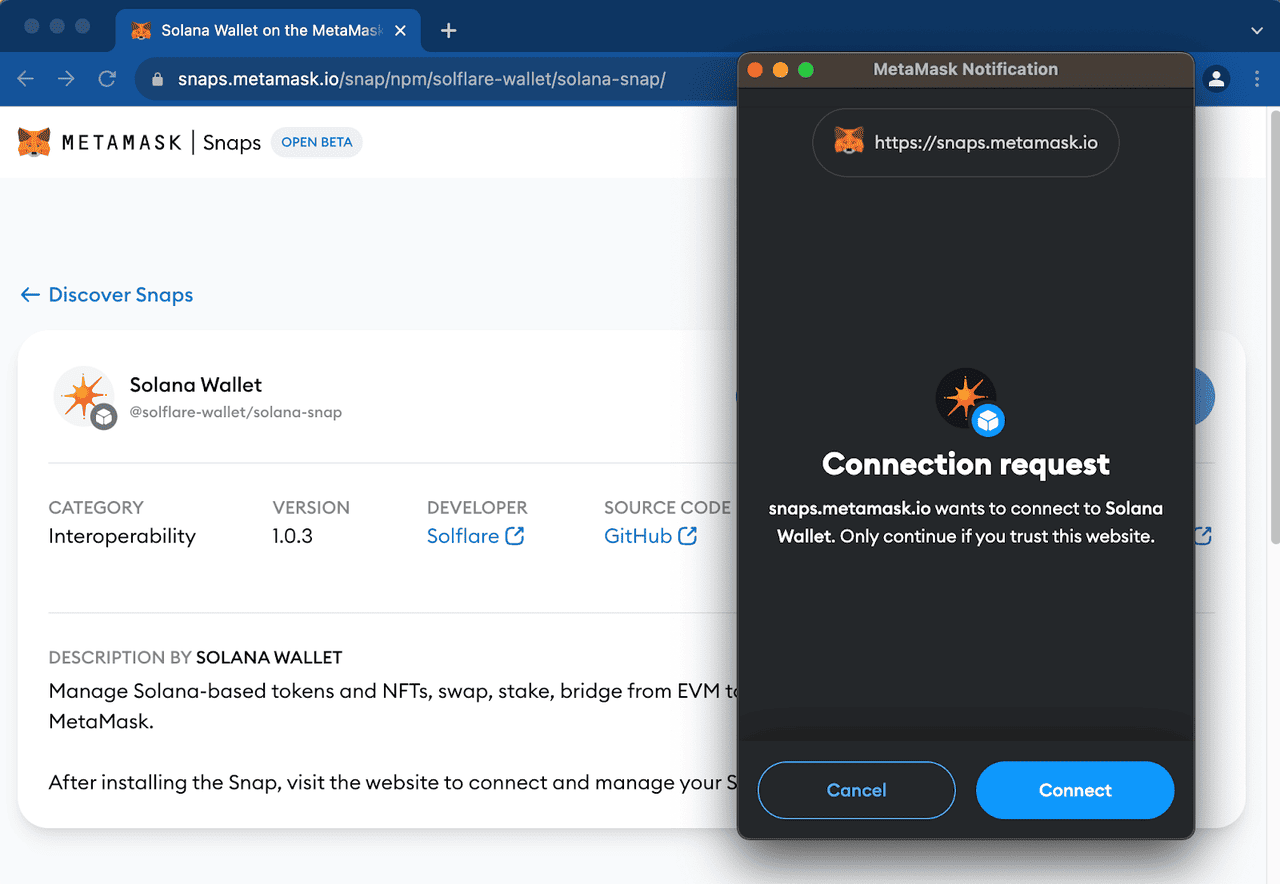
Step 4: Connect to MetaMask Snaps
Connect your wallet to the Snaps site:
Source: Quicknode
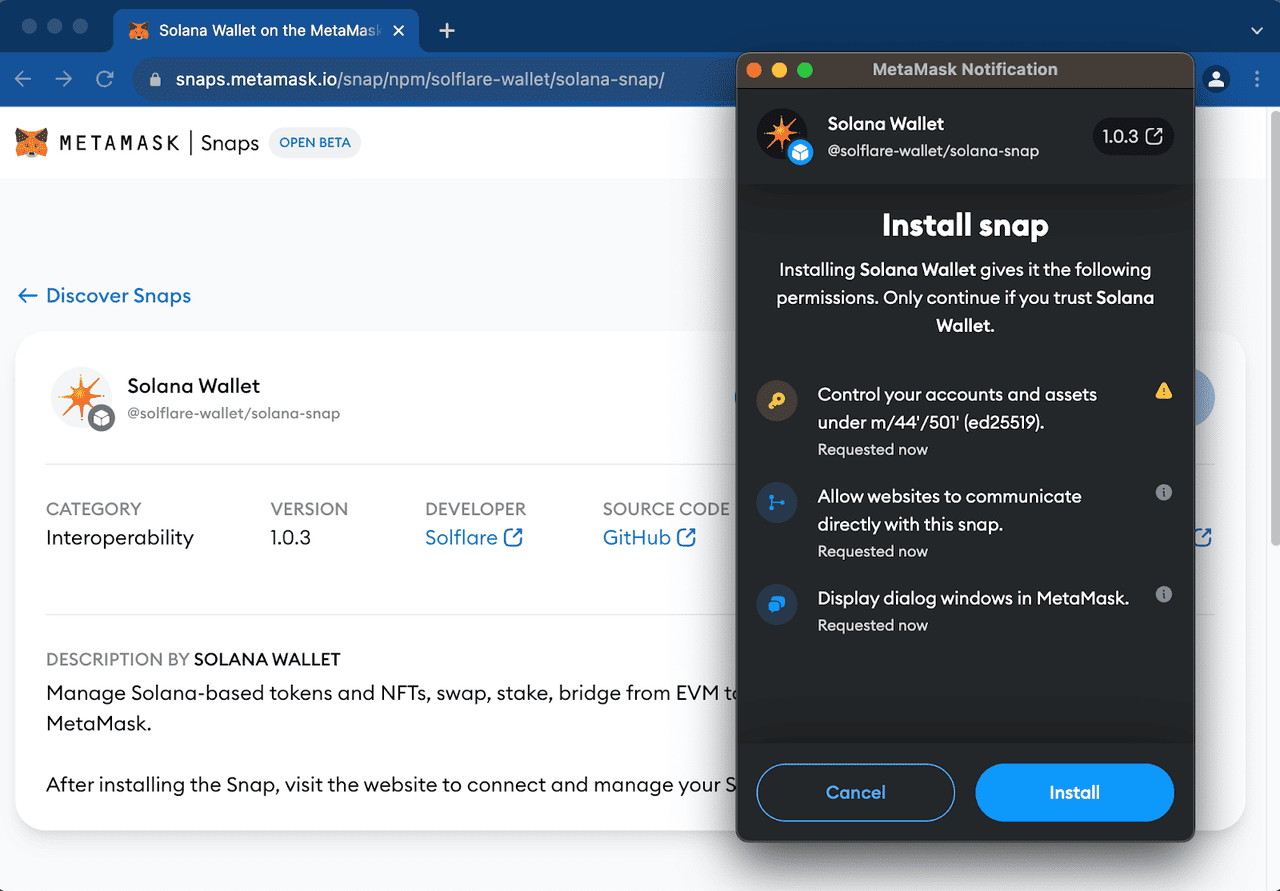
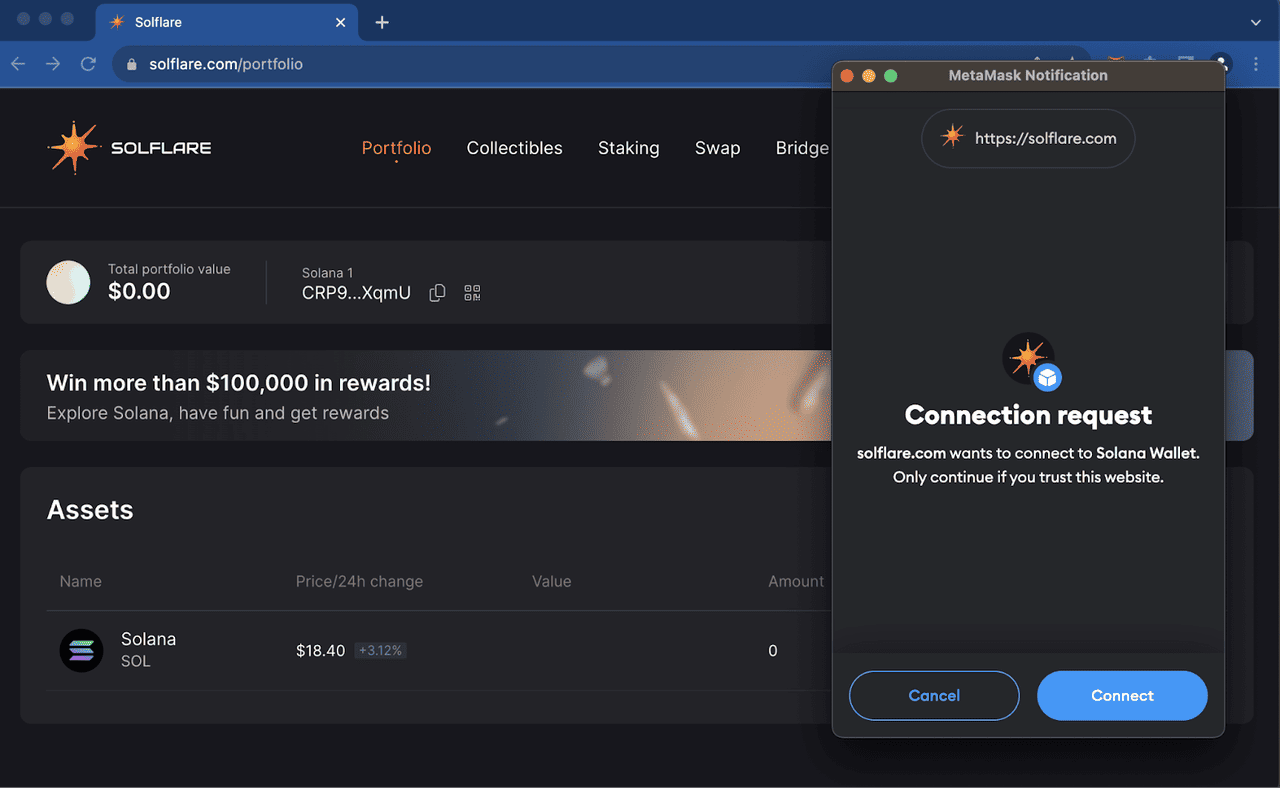
Step 5: Authorize Solflare Snap to Connect MetaMask to Solana
Authorize the Solflare Snap to utilize your seed derivation path on the ED25519 cryptographic elliptic curve (this is the curve used by Solana, and is different from the ECDSA curve used by Ethereum), meaning the Snap will be able to derive your Solana wallet address from your MetaMask seed.
Source: Quicknode
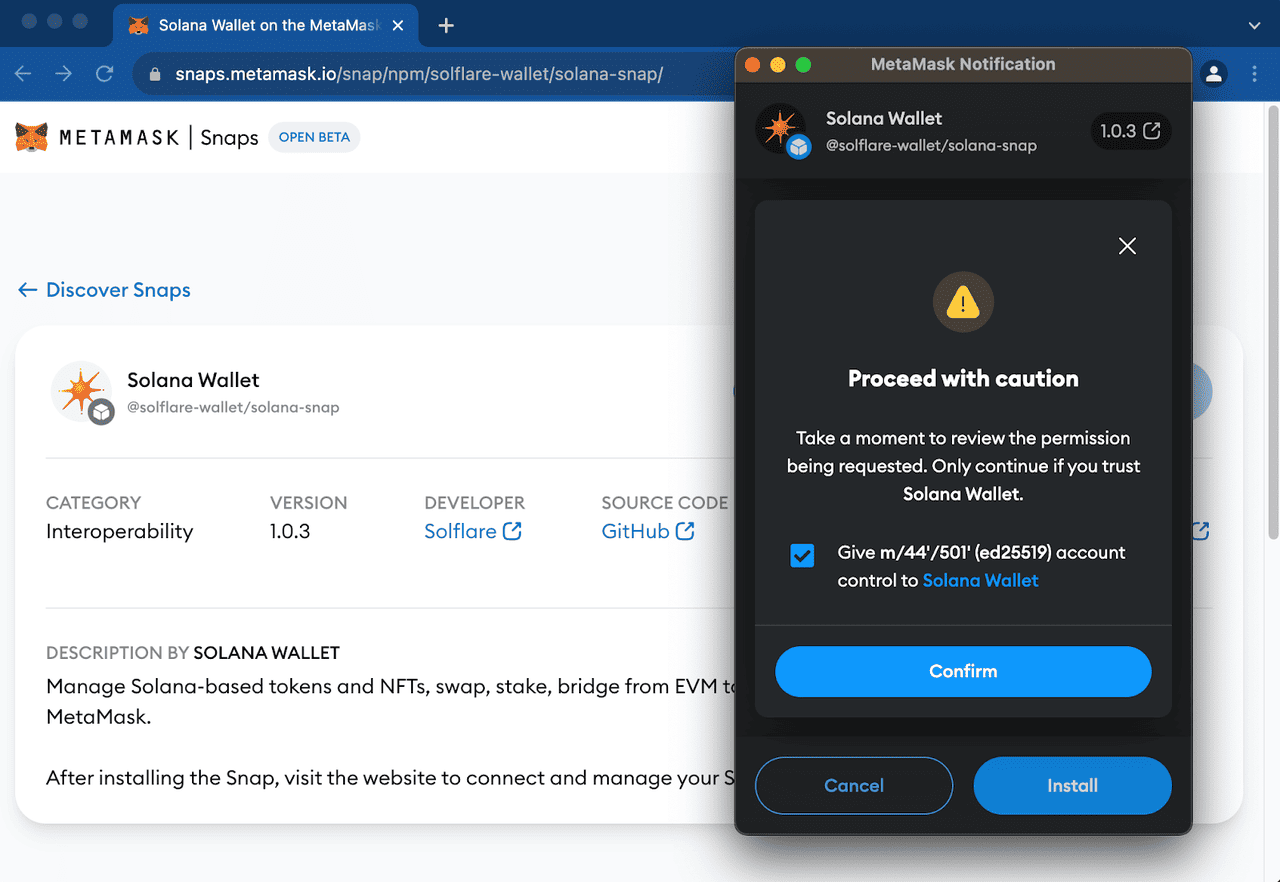
Step 6: Confirm and Authorize the Connection
You will be asked to confirm the authorization again:
Source: Quicknode
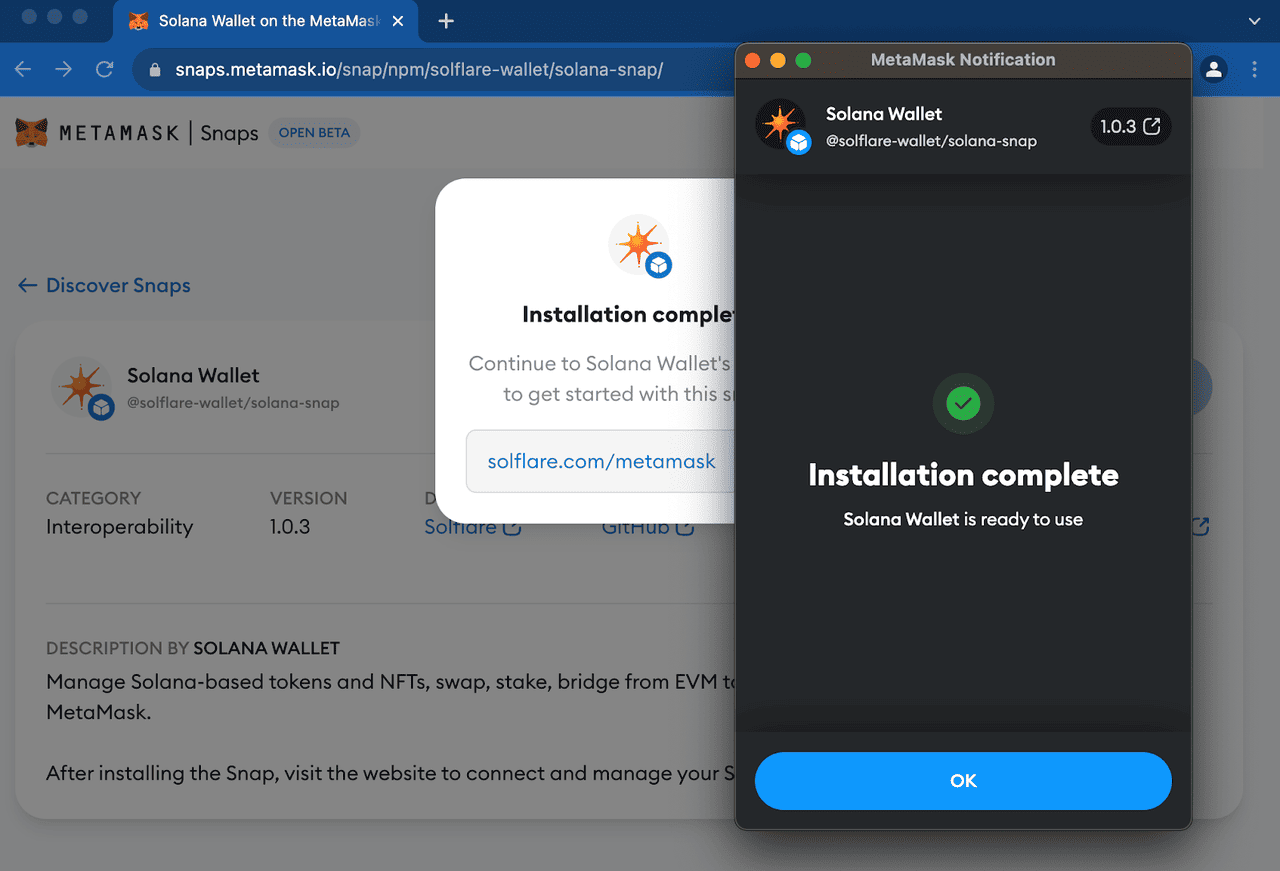
Step 7: Complete the MetaMask-Solana Connection Process
Once installation is complete, click "OK" in your wallet and follow the redirect to Solflare's MetaMask Connection Page
Source: Quicknode
Step 8: Add Your Solana Wallet to MetaMask Snaps
From the Solflare MetaMask Snaps Connection Page, click "Get Started" and follow the steps to onboard your Solana wallet.
Step 9: Connect Solana Wallet to Solflare
You should be prompted to connect your Solana wallet to the Solflare site:
Source: Quicknode
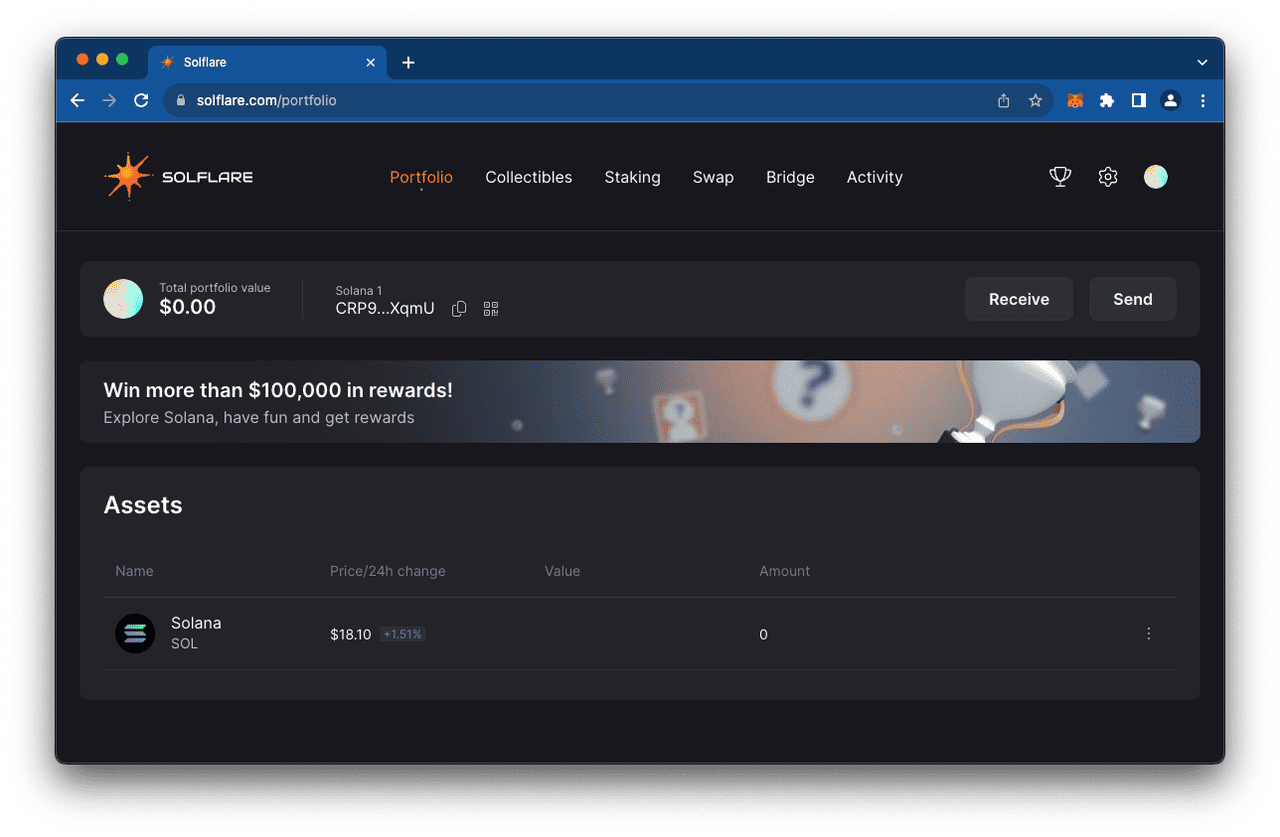
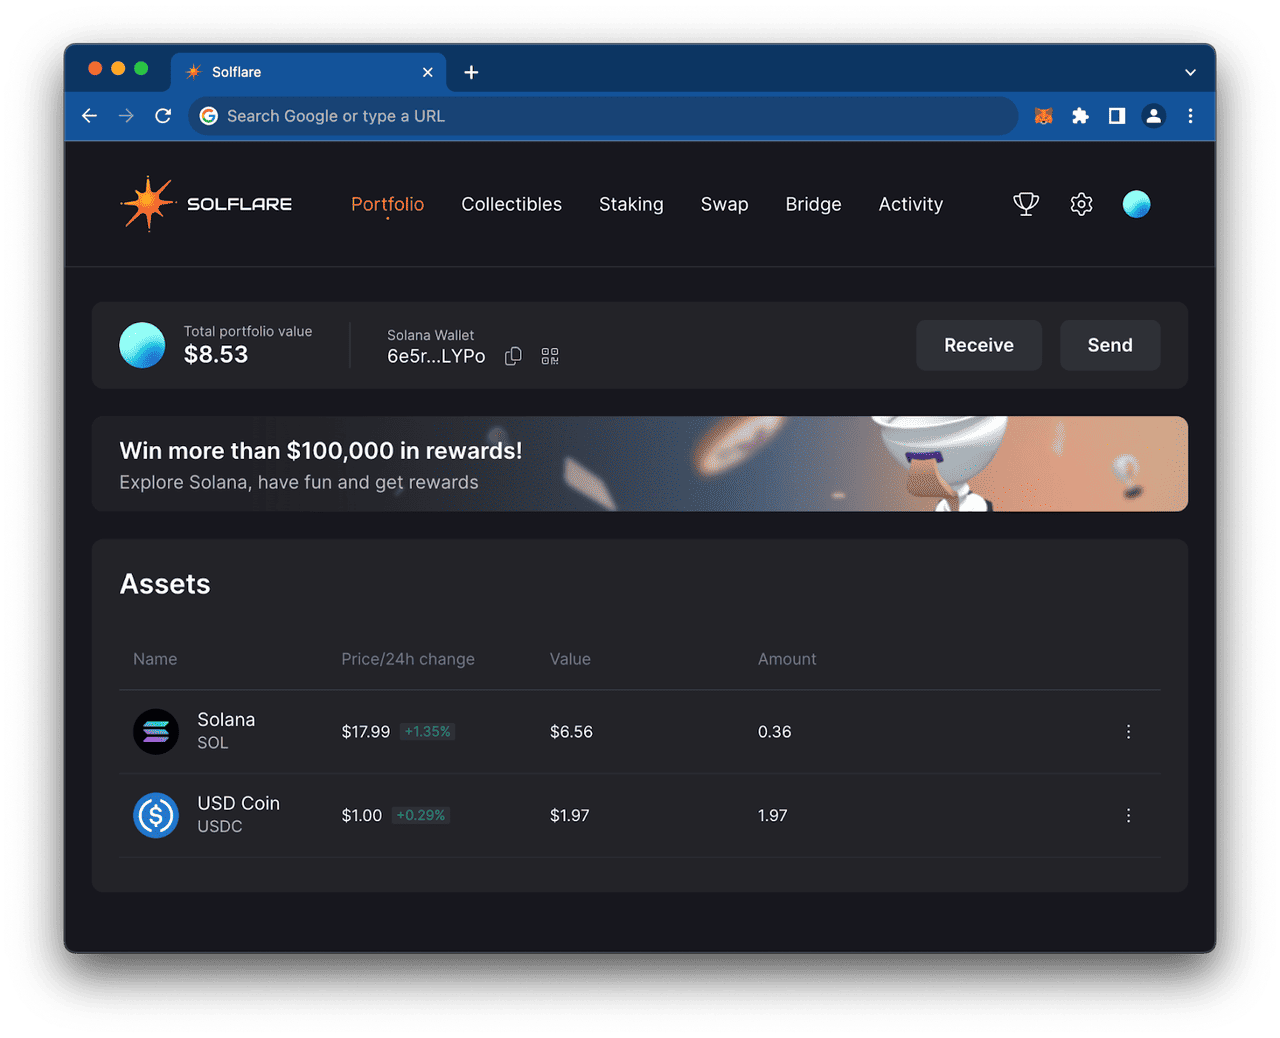
You should now be able to see your Solana wallet and portfolio (it should be empty if you are just getting started).
Source: Quicknode
Step 10: Fund Your MetaMask Wallet with SOL
You may now add funds from the BingX Spot Market to your Solana wallet.
Buy Solana Tokens on the BingX Spot Market
To fully engage with MetaMask, you'll need Solana. BingX is a secure, user-friendly centralized exchange which offers a straightforward spot market for purchasing Solana other cryptocurrencies.To kick off your journey bridging blockchains and your MetaMask wallet, consider buying tokens directly through trusted, secure exchanges like BingX.
Getting started with MetaMask is easy, and funding your wallet through BingX makes it even smoother. BingX allows you to buy popular cryptocurrencies like Solana directly on its spot market, which you can then send to your MetaMask wallet to start using DeFi apps, trading NFTs, or exploring Web3.
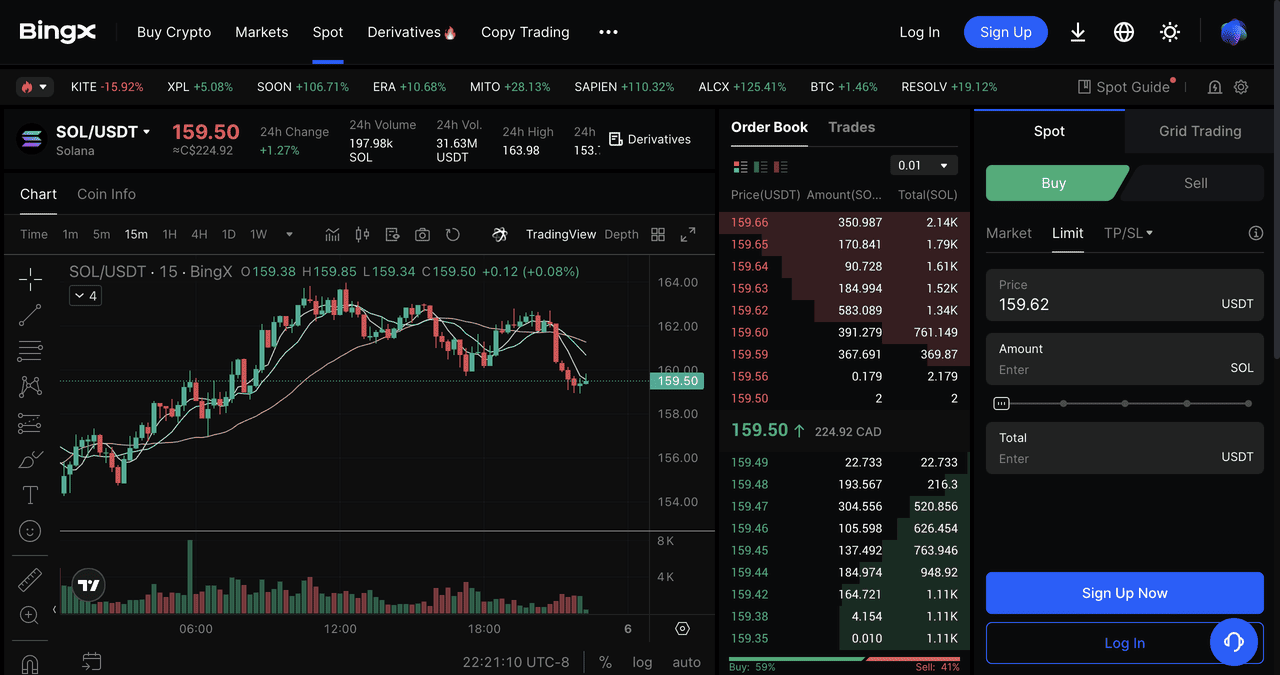
Source: SOL/USDT on BingX Spot Market
Buy SOL and other tokens on BingX spot market, powered by BingX AI's automated market analysis
Once you've purchased your crypto on BingX, you can send it to your MetaMask wallet in minutes. Just copy your MetaMask wallet address and paste it into BingX's withdrawal page. After confirming the transaction, your funds will appear in MetaMask, ready for use in the decentralized world.
BingX is a great choice because it offers low trading and transfer fees, deep liquidity for seamless transactions, and real-time prices on major tokens. With BingX AI providing smart market insights, plus a beginner-friendly interface and advanced security, it's easy and safe to buy crypto and transfer funds to MetaMask.
With BingX, you're set up for a fast, secure, and affordable Web3 onboarding experience.
Other Ways to Add Funds to Your MetaMask Wallet
You can fund your MetaMask wallet not only by transferring crypto from centralized exchanges like BingX, but also by buying crypto directly within MetaMask using integrated providers or swapping tokens via decentralized exchanges (DEXs) like Raydium. These options offer flexibility, but fees, slippage, and network conditions may vary.
How to Bridge ETH to Solana Using MetaMask
Note: If you already have SOL in another wallet, you can send SOL to your new wallet directly and skip this step.
Step 1. You will be prompted to connect your Ethereum wallet to the site so we can transfer funds between chains. Go ahead and connect your wallet:

Source: Quicknode
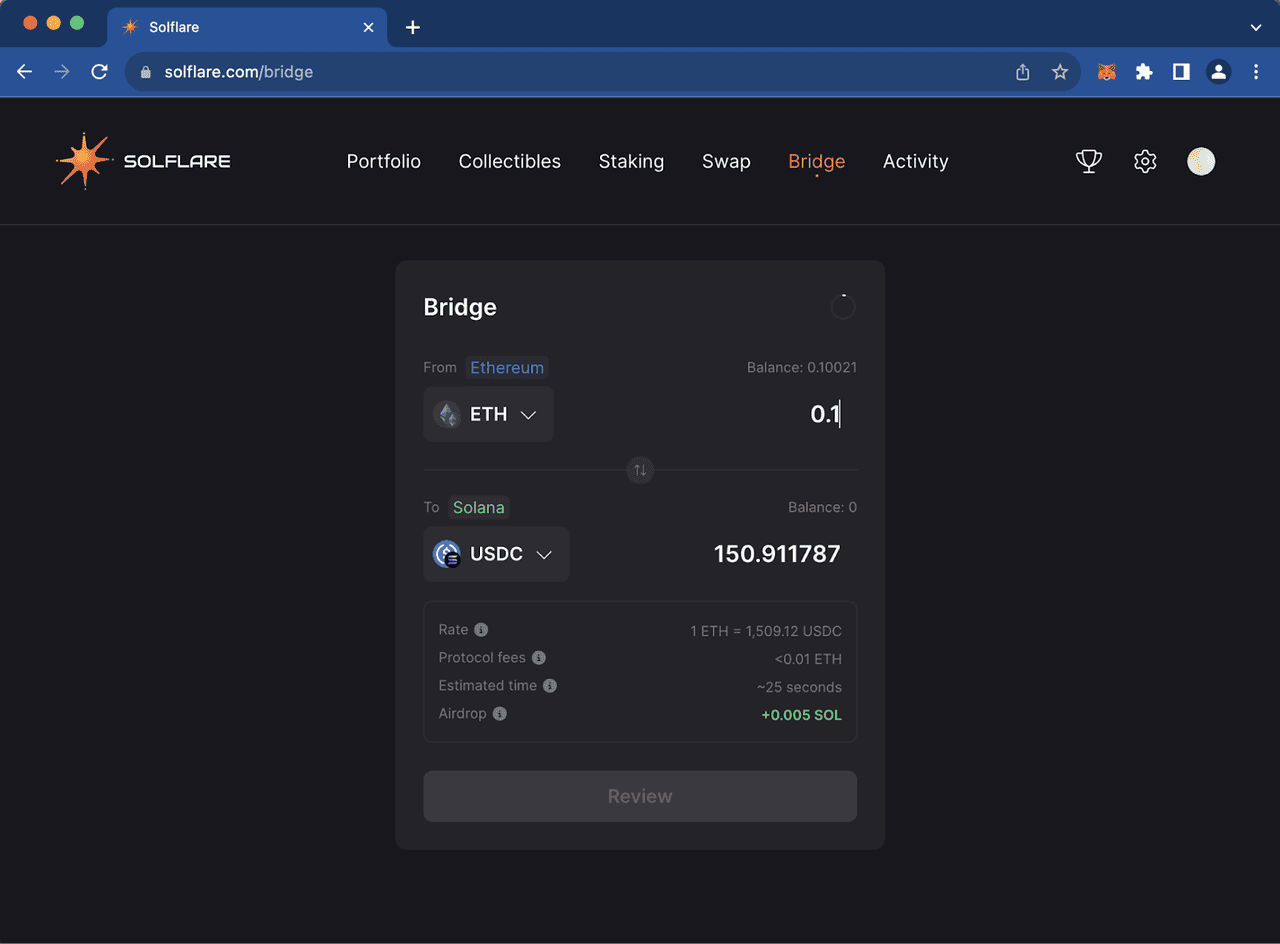
You will now see your ETH balance in the "Bridge" container.
Step 2: Enter the amount of ETH you would like to bridge to Solana, and then select your desired token, such as SOL or USDC-SPL, the Solana version of USDC.
Source: Quicknode
Step 3: Click "Review" to review the transaction details and follow the dialogue to complete the swap.
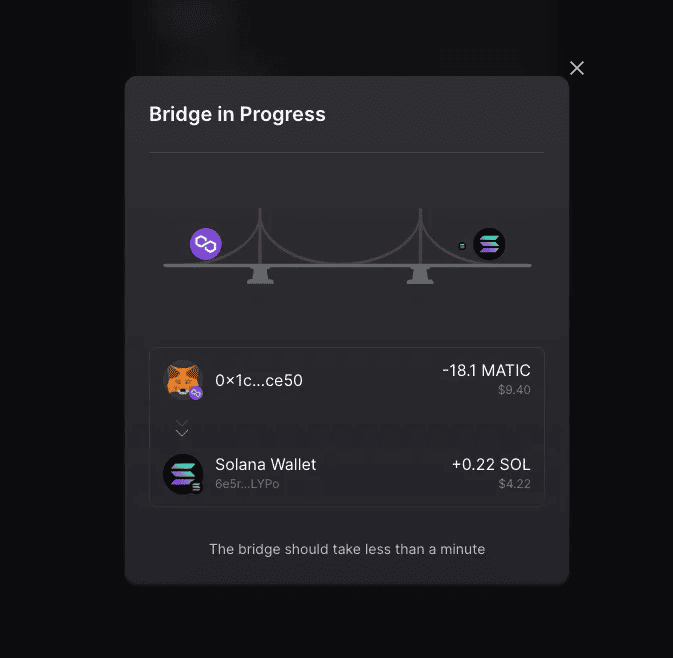
Source: Quicknode
Step 4: Return to your Portfolio Page and see your new SOL or USDC balance.
Source: Quicknode
How to Interact with Solana dApps Using MetaMask
Let's try to interact with a popular Solana dApp, Jupiter. Jupiter is a DEX and LP aggregator that allows you to swap tokens on the Solana blockchain. Unlike the previous swap we did that bridged between chains, Jupiter will allow us to test using our MetaMask wallet to swap between Solana tokens.
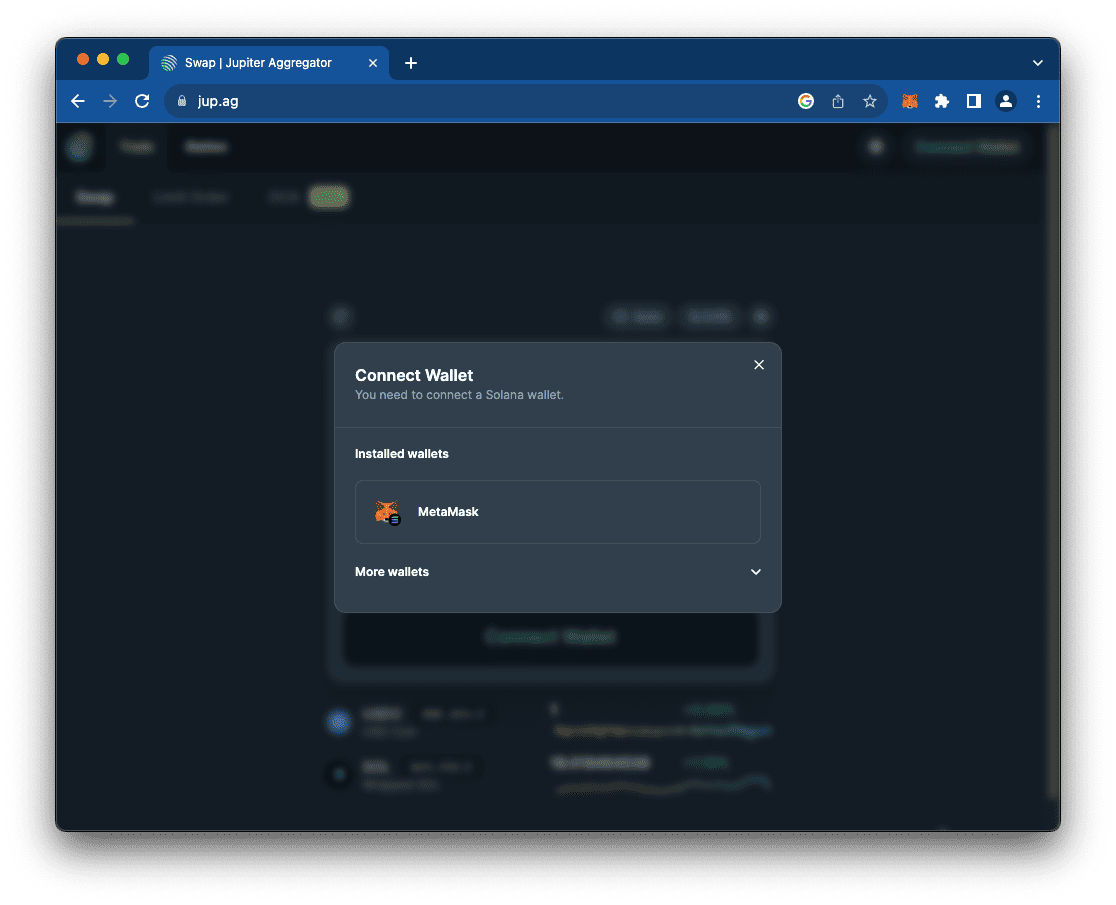
Step 1: Navigate to Jupiter and click "Connect Wallet" in the top right corner.
You should notice your MetaMask wallet in the list of available wallets:
Source: Quicknode
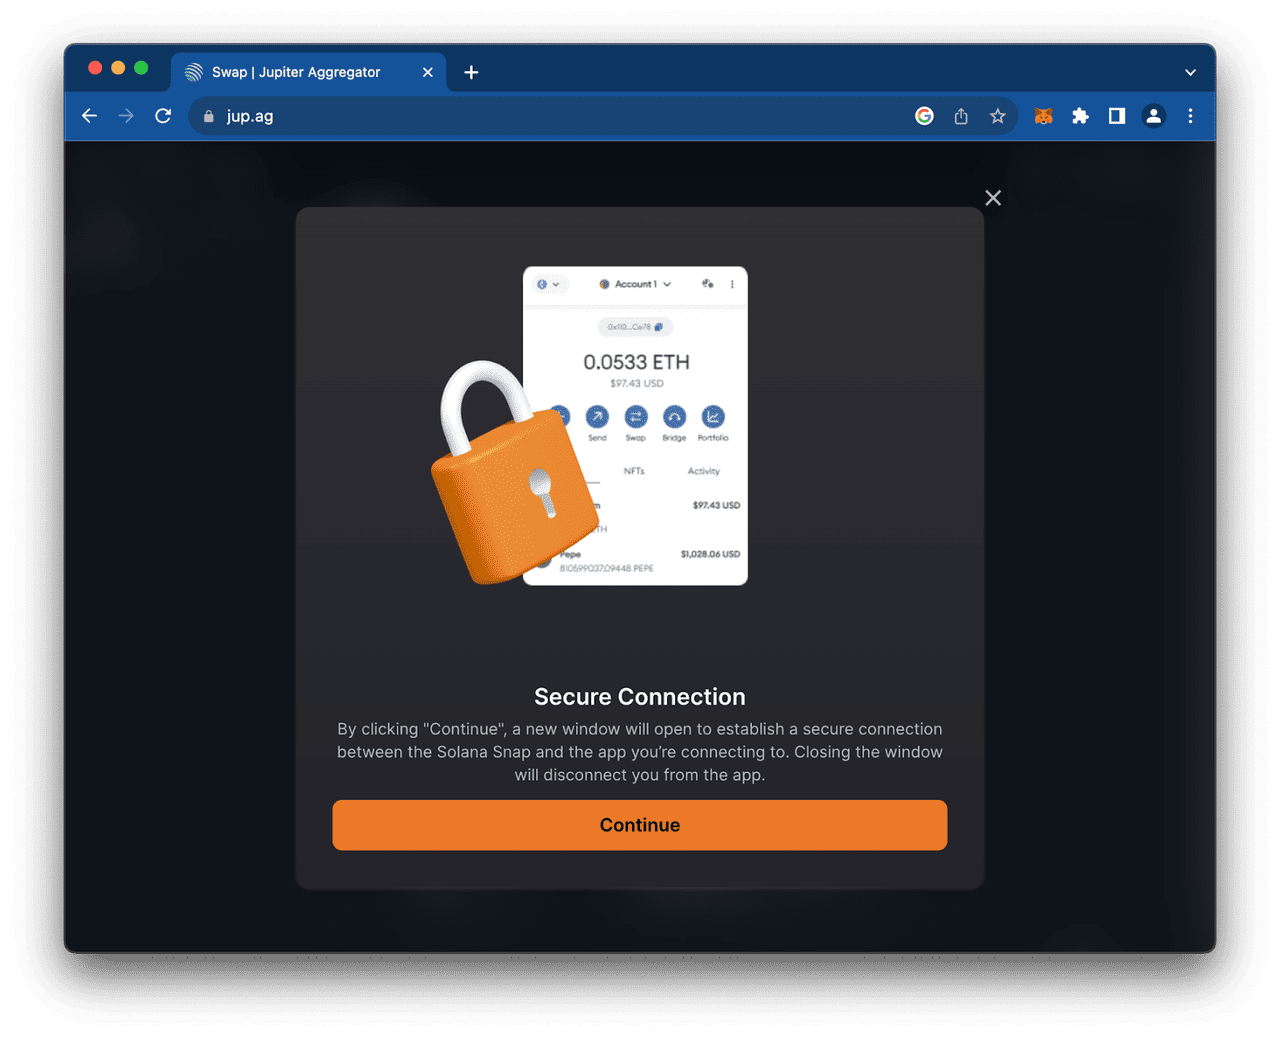
Step 2: Connect your wallet by following the on-screen prompts.
The MetaMask Snap will open a pop-up window during your connection on the site:
Source: Quicknode
Once connected, you will notice a Solflare widget in the bottom corner of the page displaying your SOL balance.
Step 3: Select a token to which you would like to swap, e.g., USDC, BONK, mSOL, and enter the amount you want to swap.
You will be prompted to confirm the transaction in your MetaMask wallet:
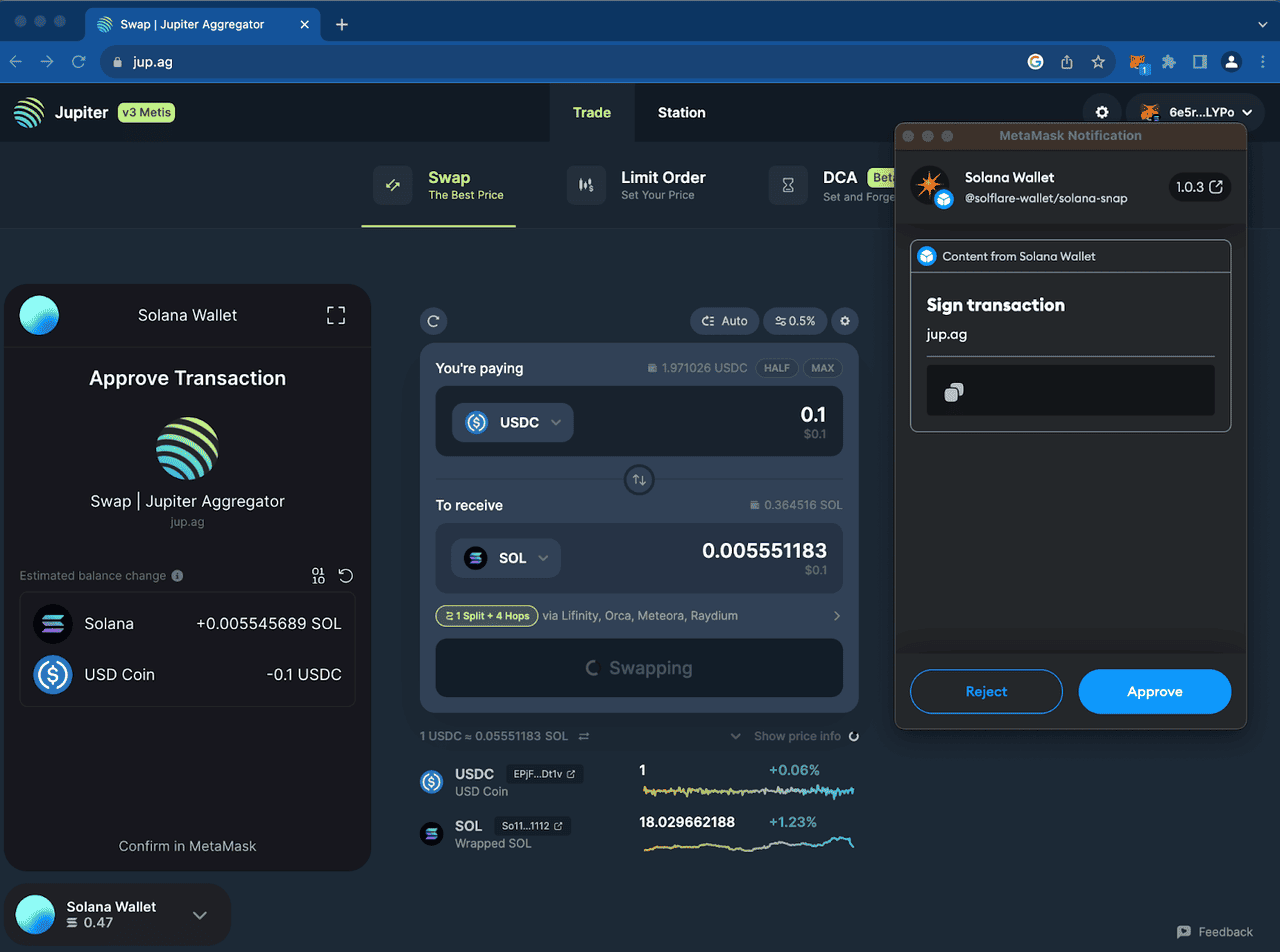
Source: Quicknode
Once the transaction is completed, you should see a confirmation in the bottom right corner.
You can click the link to access the transaction on Solana Explorer, or you can access your transaction history in the widget or the Solflare site:
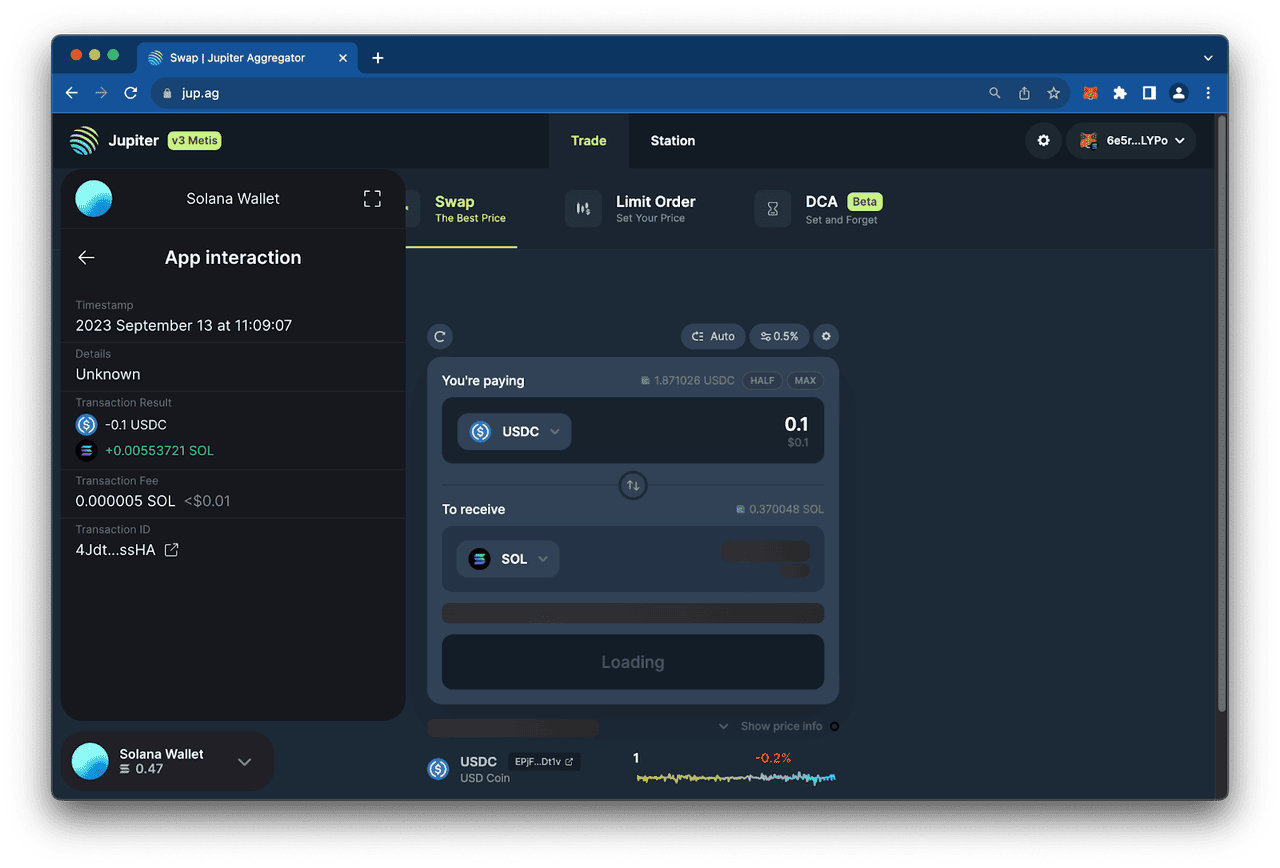
Source: Quicknode
How to Participate in the Upcoming MetaMask ($MASK) Airdrop
Source: MetaMask via X
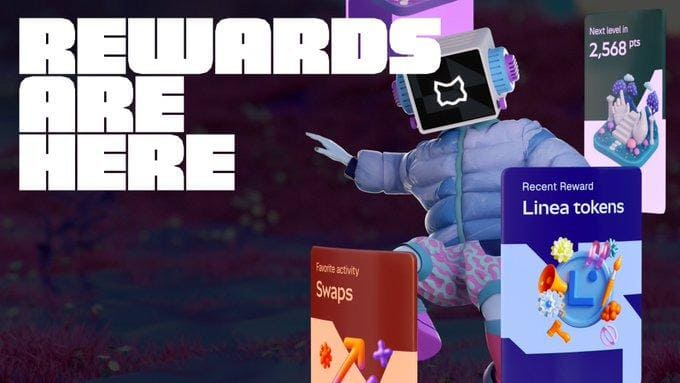
The Season 1 rewards started on Oct 28, 2025 and are live for 90 days following the release. MetaMask is offering over $30 million in $LINEA rewards. By using the steps in this guide, $LINEA can be swapped for tokens on other blockchains like Solana. Solana allows for faster transaction speeds with drastically lower fees than Ethereum.
This airdrop allows MetaMask users to earn while they use their wallet. Participants can receive rewards for on-chain activities like, trading, swapping, and referring others to MetaMask. Earning and holding these tokens will also count toward future rewards, like the MetaMask token that has already been confirmed to airdrop soon. Users that bridge assets in the wallet, by following the steps above, which may qualify you for more rewards. You can get the full details and official announcement on MetaMask's X account.
To maximize your chances at exclusive airdrop rewards, focus on high-volume interactions on supported EVM chains like Polygon or Arbitrum before the anticipated Q4 2025 airdrop distribution or December Token Generation Event (TGE), which will celebrate long-term contributors in the MetaMask community, as highlighted in recent X posts from MetaMask.
So when is the MetaMask airdrop? While exact dates remain fluid, staying active now could position you for substantial rewards, but always verify claims through official channels to avoid scams.
Conclusion
Connecting Solana to MetaMask unlocks access to one of the fastest and most scalable blockchain networks. It expands the capabilities of an Ethereum native wallet to swap and trade with lower fees. This extension also allows participants to be involved with a community that is at the forefront of gaming apps. Staking rewards are also a plus and when combined with MetaMask's latest airdrop, participants will reap rewards on top of rewards. With more engagement in MetaMask, users can interact with Solana-based decentralized applications and experience a new level of speed, efficiency, and innovation within the Solana ecosystem with their existing web3 wallet.
